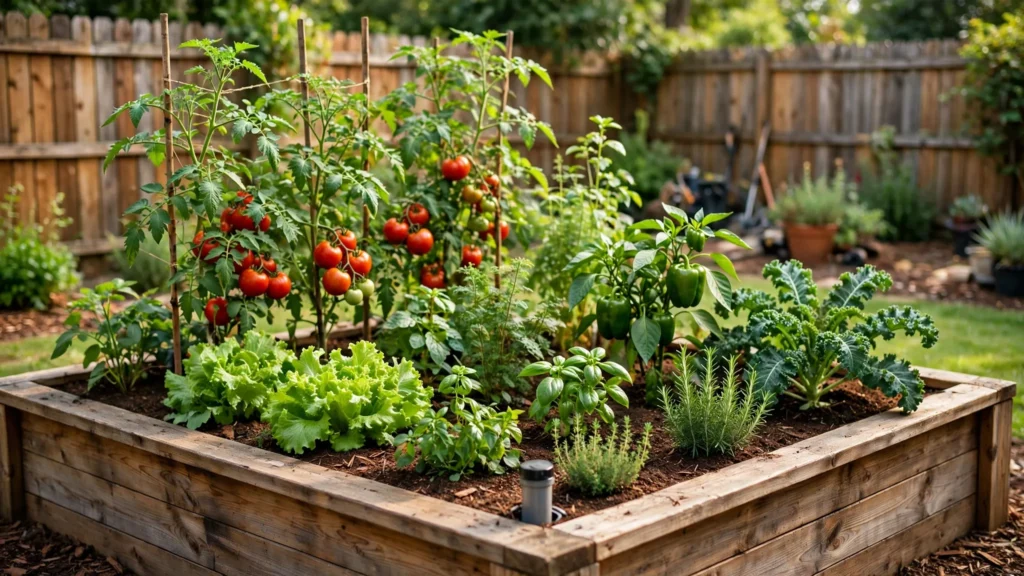
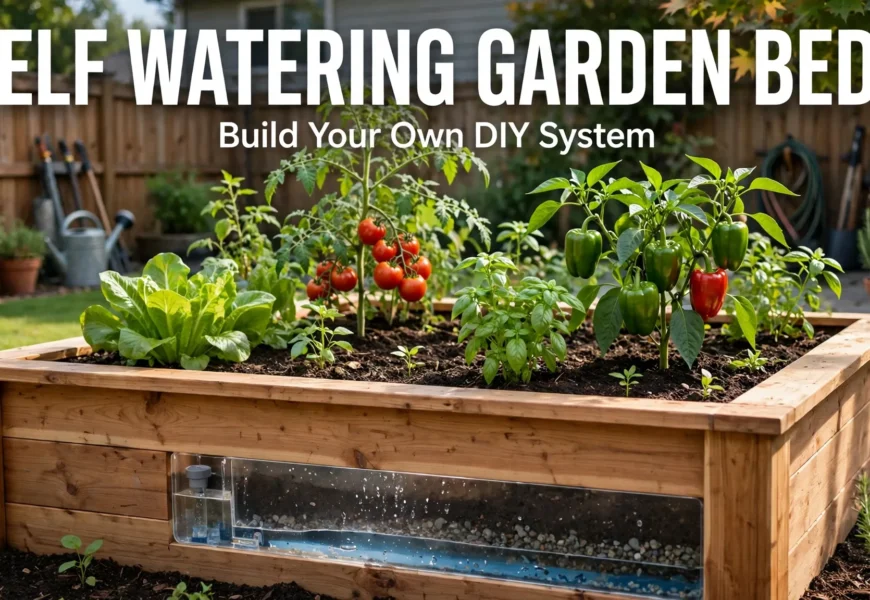
Keeping a backyard vegetable garden watered can become a daily chore, especially during hot American summers. Self watering garden beds offer a practical way to manage that routine. They have a built-in water reservoir that supplies moisture to the growing medium through a process called capillary action. Instead of watering the soil from above every day, gardeners can refill the reservoir as needed. For homeowners who want to grow vegetables with less frequent watering, self watering raised beds can be a useful DIY project. Here’s how they work, what they cost, and how to build and care for one.
TL;DR: Self Watering Garden Beds at a Glance
Self watering garden beds store water in a reservoir beneath the growing medium. Moisture travels upward through the soil by capillary action, supplying plant roots from below. You can build one with a raised bed frame, waterproof liner, PVC fill tube, overflow pipe, aeration barrier and suitable growing mix.
Quick Facts About Self Watering Garden Beds
| Feature | Details |
|---|---|
| Gardening system | Sub-irrigated wicking bed |
| Water delivery | Capillary action |
| Main component | Water reservoir |
| Common materials | Wood, waterproof liner and PVC pipe |
| Suitable plants | Tomatoes, lettuce and peppers |
| Maintenance | Reservoir and soil checks |
| Best use | Backyard vegetable gardening |
What Are Self Watering Garden Beds?
Self watering garden beds are raised planting spaces with a water storage area underneath the soil. The reservoir holds water until the growing medium draws it upward toward plant roots. This setup is also called a wicking bed or sub-irrigated planter.
Traditional raised garden beds receive water from above through a hose, watering can or irrigation system. Self watering raised garden beds supply moisture from below instead. A DIY wicking bed usually has a custom-built reservoir, while ready-made self watering planters come with their own water storage components.
They can be useful for growing vegetables, herbs and other plants that prefer steady moisture. But the design still needs proper airflow and an outlet for excess water.
How Do Self Watering Garden Beds Work?
Understanding the Wicking System
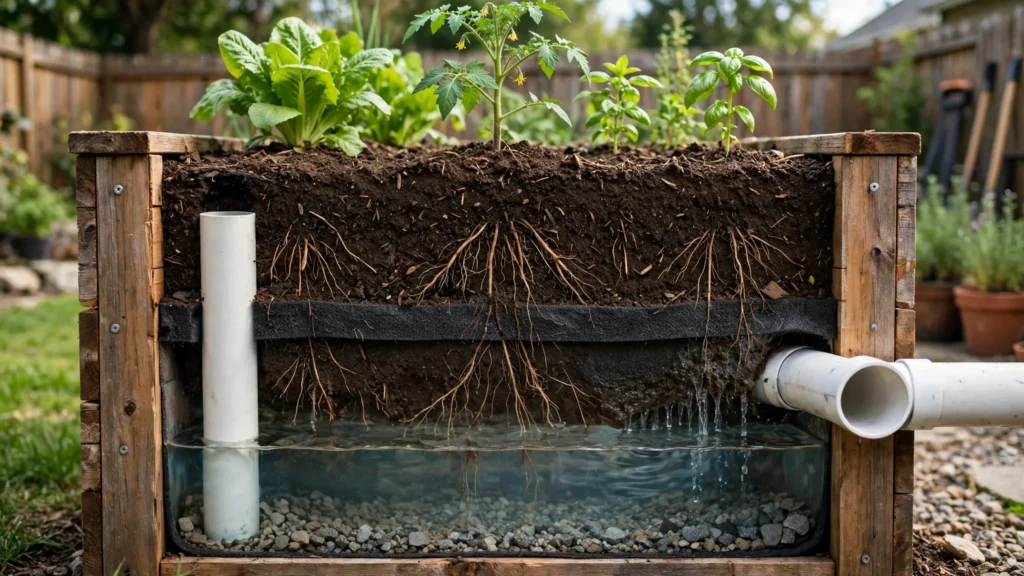
A self-watering bed works through capillary action. This is the movement of water through small spaces in a material, including the tiny gaps between growing medium particles. As the upper soil dries, moisture moves upward from the reservoir to replace some of the water used by plant roots.
The growing medium needs to make contact with the wicking area. If the soil is too coarse, compacted or poorly arranged, water may not travel through it properly. A suitable mix helps maintain moisture while leaving enough air around the roots.
Important Components of a Self-Watering System
A typical setup includes:
- Water reservoir: Holds water beneath the growing area.
- PVC fill tube: Provides access for adding water.
- Overflow pipe: Releases excess water when the reservoir reaches its intended level.
- Aeration barrier: Separates the growing medium from the reservoir while supporting airflow.
- Growing medium: Holds plant roots and draws moisture upward.
Each part has a job. A blocked overflow or poorly supported reservoir can cause problems, so check the design before adding soil.
Benefits and Drawbacks of Self Watering Garden Beds
Benefits
- Less frequent watering: The stored supply can reduce how often you need to water by hand.
- Steadier moisture: Plants can receive water from below as the growing medium dries.
- Reduced surface evaporation: Water stored beneath the soil is less exposed to direct sunlight and wind.
- Convenient gardening: Useful for busy homeowners who cannot water their vegetable garden every morning.
- Better water management: A well-built system can help limit unnecessary watering.
Drawbacks
- Higher setup cost: A reservoir, liner, pipes and frame add to the price.
- Regular checks: You still need to refill the reservoir and inspect the system.
- Salt buildup: Fertilizer minerals can collect in the growing medium over time.
- Waterlogging risk: Poor airflow or a blocked overflow can leave roots too wet.
- Not suitable for every plant: Some plants prefer drier soil or need different watering conditions.
How Much Do Self Watering Garden Beds Cost?
The cost depends on bed size, construction materials and whether you build the system yourself. A small DIY bed may be fairly affordable, while a large cedar structure with a lined reservoir can cost considerably more.
DIY vs Store-Bought Pricing
| Type | Estimated USA Cost |
|---|---|
| Small DIY bed | $50–$100 |
| Medium DIY bed | $100–$200 |
| Large DIY bed | $200–$400+ |
| Ready-made planter | $40–$150 |
| Large commercial bed | $150–$400+ |
These are planning estimates, not confirmed retail prices. Actual costs vary by dimensions, materials, brand and location. Tools and labor may add to the total.
What Affects the Total Cost?
Cedar and redwood lumber usually cost more than some basic construction options, but they are commonly used for outdoor projects. A waterproof pond liner, PVC fill pipe, overflow fittings, soil and compost also add to the bill. Bed size matters too — a larger reservoir needs more material and support.
Materials Needed to Build a Self Watering Garden Bed
For a basic DIY self watering garden bed, gather:
- Cedar or other suitable rot-resistant lumber
- Exterior-grade screws
- Waterproof pond liner
- PVC fill pipe
- Overflow pipe and fittings
- Geotextile fabric or a suitable permeable barrier
- Reservoir support material
- Raised-bed growing mix and compost
- Drill, saw, measuring tape and safety equipment
Decide on the bed dimensions before buying supplies. A 4-by-8-foot bed needs more lumber and liner than a compact 2-by-4-foot planter. Check the liner’s dimensions carefully, including enough material to cover the reservoir area without stretching it tightly.
How to Build Self Watering Garden Beds Step by Step
A basic wicking bed can be built with common DIY materials. The exact reservoir design will depend on the bed’s size and construction, so follow the specifications of the components you purchase.
Step 1 – Choose a Sunny Location
Pick a reasonably level spot with enough sunlight for your planned vegetables. Most fruiting crops, such as tomatoes and peppers, need several hours of direct sun each day. Leave room around the bed so you can refill the reservoir, harvest crops and carry out routine garden work.
Step 2 – Build the Raised Bed Frame
Cut your lumber to the required dimensions and assemble the frame with exterior-grade screws. A 4-by-8-foot bed is a common size for backyard vegetable gardening, although smaller beds can be easier to reach and maintain. Make sure the frame sits firmly on the ground.
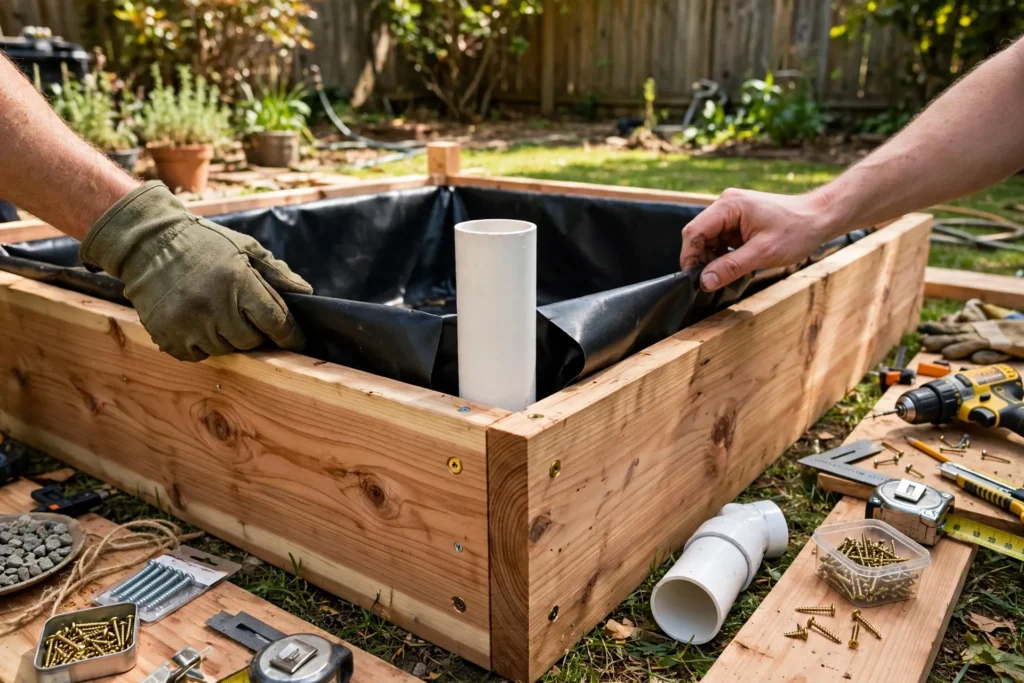
Step 3 – Install the Waterproof Liner
Fit the waterproof liner over the reservoir area. Avoid sharp edges, protruding screws or rough surfaces that could puncture it. Secure the liner without pulling it too tightly around corners. Before adding other materials, test the lined section for leaks.
Step 4 – Create the Water Reservoir
Prepare the bottom section to hold water beneath the growing medium. Use a reservoir design that can support the weight of wet soil and plants. The water storage area needs enough capacity for the bed’s dimensions, but it should not take up so much space that roots have too little room.
Step 5 – Add the Fill Tube and Overflow Pipe
Install a PVC fill tube that reaches the reservoir from above the soil line. Add an overflow outlet at the planned maximum water level. This pipe gives excess water somewhere to go after heavy rain or overfilling. Keep the outlet clear and accessible.
Step 6 – Add the Aeration Barrier and Growing Medium
Place a suitable permeable barrier above the reservoir system to keep the growing medium in place while supporting airflow. Add a suitable raised-bed mix gradually. Avoid pressing it down too firmly, as compacted soil can restrict air movement and water distribution.
Step 7 – Fill and Test the System
Add water through the fill tube and watch for leaks around the liner and fittings. Check that excess water exits through the overflow pipe. Allow the growing medium to draw up moisture before planting, then inspect the soil near the root zone. It should feel moist, not soggy.
What Is the Best Soil for Self Watering Garden Beds?
Choosing a Suitable Growing Medium
A loose, well-aerated raised-bed mix is a good starting point. Combine quality raised-bed soil with mature organic compost according to the needs of your plants and the product instructions. The growing medium should hold enough moisture for capillary movement without becoming dense and airless.
Soil Mistakes to Avoid
Avoid filling the bed with heavy, compacted backyard soil. It may restrict airflow and make moisture movement uneven. Too much compost can also create a dense mix, depending on the material. Don’t assume that adding more water will fix poor plant growth — check the soil structure and reservoir first.
What Vegetables Grow Best in Self Watering Garden Beds?
Many vegetables grow well in wicking beds when they have enough root space, suitable temperatures and good airflow.
| Vegetable | Growing Consideration |
|---|---|
| Tomatoes | Need consistent moisture and adequate root space |
| Lettuce | Grows well with even soil moisture |
| Peppers | Prefer regular moisture and warm conditions |
| Spinach | Performs better in cooler growing weather |
| Kale | Needs moist, well-aerated soil |
| Herbs | Water needs vary by type |
For spring and summer gardening in the USA, match your planting schedule to your local climate and USDA growing zone. Tomatoes and peppers suit warm-season gardens, while spinach and lettuce often perform better during cooler parts of the year. A self watering vegetable garden still needs seasonal planning.
How to Maintain Self Watering Garden Beds
Regular Maintenance Checklist
- Check the reservoir level through the fill tube.
- Inspect the overflow pipe for blockages.
- Feel the growing medium to check root-zone moisture.
- Apply fertilizer according to plant needs and product directions.
- Watch for mineral or salt buildup near the soil surface.
- Maintain a light mulch layer where suitable.
Common Problems and Solutions
| Problem | Possible Solution |
|---|---|
| Dry plants | Check the reservoir level and soil contact with the wicking area |
| Waterlogged soil | Inspect the overflow pipe and airflow |
| Yellow leaves | Check moisture, nutrients and signs of root stress |
| Salt buildup | Flush the growing medium when suitable for the bed design |
| Poor growth | Check soil aeration, sunlight and plant spacing |
Root rot can develop if the growing area stays too wet with too little air. If plants look unhealthy, don’t just refill the reservoir. Check the soil first.
Frequently Asked Questions
Are Self Watering Garden Beds Worth It?
They can be worth the cost if you want to reduce frequent hand-watering and maintain steadier soil moisture. They need a larger initial setup than a basic raised bed, though.
How Often Do You Refill a Self-Watering Garden Bed?
There is no fixed schedule. Reservoir size, weather, plant type and growth stage all affect water use. Check the water level regularly, especially during hot summer weather.
Can Tomatoes Grow in Self Watering Garden Beds?
Yes. Tomatoes can grow well in wicking beds when they have enough root space, suitable growing medium and good airflow. Avoid keeping the root zone constantly saturated.
Do Self Watering Garden Beds Need Drainage?
Yes. An overflow outlet is needed to release excess water and prevent the reservoir from filling beyond its intended level.
Can Self-Watering Garden Beds Get Too Wet?
Yes. A blocked overflow, poor aeration or unsuitable growing medium can lead to waterlogged conditions. Inspect the system if the soil stays soggy.
Give Your Backyard Garden a Better Watering Routine
Self watering garden beds can make vegetable gardening easier by storing water beneath the growing medium and supplying moisture from below. A sound reservoir design, suitable soil and a clear overflow outlet all matter. Start with a manageable bed size, test the system before planting and check moisture regularly as your vegetables grow.