Tomato plant protectors from frost, pests, and weather damage with these 9 proven methods. Stop losing your harvest before it even begins.
Introduction
You’ve been checking those tomatoes every single day. The plants look strong, fruits are forming, and everything seems fine. Then one cold night rolls in, or a hailstorm comes out of nowhere, and half your season’s work is gone.
Every vegetable gardener hits this wall eventually. But the gardeners who consistently bring in a full harvest aren’t just luckier — they’ve built protection systems around their plants before problems arrive. That’s what this guide is about.
Why Tomato Plants Are So Vulnerable
Tomatoes are warm-season crops that have a surprisingly narrow comfort zone. They thrive between 60°F and 85°F (15°C–29°C), struggle below 50°F (10°C), and sustain cellular damage when temperatures drop below 32°F (0°C). Too much heat above 95°F (35°C) causes blossom drop. Heavy rain encourages fungal diseases. Pests like aphids, hornworms, and whiteflies can strip a plant almost overnight.
That vulnerability is actually why tomato plant protectors exist as a real product category — not just DIY hacks. There’s a legitimate need for physical barriers, covers, supports, and shelters specifically designed for tomatoes, and understanding what each one does helps you spend your time and money on what actually works.
9 Types of Tomato Plant Protectors That Actually Work
1. Frost Blankets and Row Covers
If you’ve ever lost tomato plants to an unexpected late spring frost, you know how gutting that feels. Frost blankets (also called row covers or floating row covers) are lightweight, breathable fabric sheets that trap heat close to the plant while still allowing light and moisture through.
They typically come in different weights: lightweight covers allow more light and are used for mild frost protection, while heavier covers provide more warmth but reduce light transmission. For tomatoes, a mid-weight cover rated to protect down to about 28°F (–2°C) is usually sufficient.
How to use them: Drape over plants in the evening before a forecasted frost. Remove or open them during the day to allow pollination and prevent overheating. Use hoops or stakes to keep the fabric off the foliage.
2. Wall-O-Water and Season Extenders
Wall-O-Water devices are clear plastic teepee-shaped protectors filled with water. Water absorbs heat during the day and releases it at night, creating a microclimate around the plant that can be 10–20°F warmer than the outside air.
Gardeners in colder climates use these to plant tomatoes 4–6 weeks earlier than the average last frost date. That early start can mean the difference between a full harvest and barely getting ripe fruit before fall frost hits.
A neighbour of mine in a zone 5 area swears by Wall-O-Water devices. She typically gets her tomatoes in the ground in late March and starts harvesting six weeks before anyone else on her street. It’s a simple tool but genuinely effective.
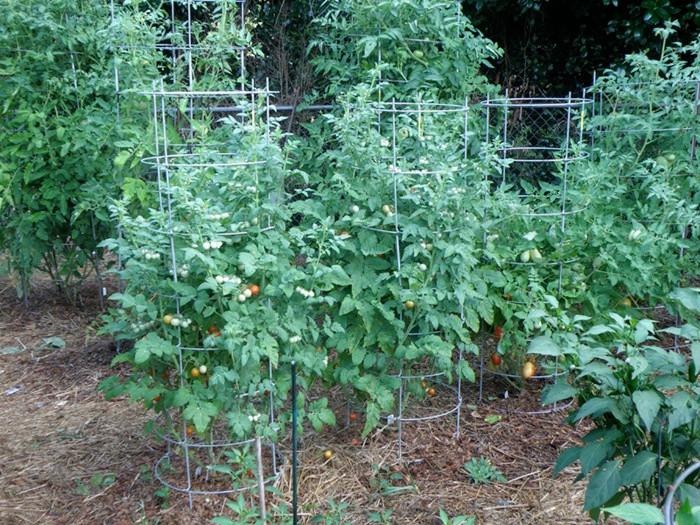
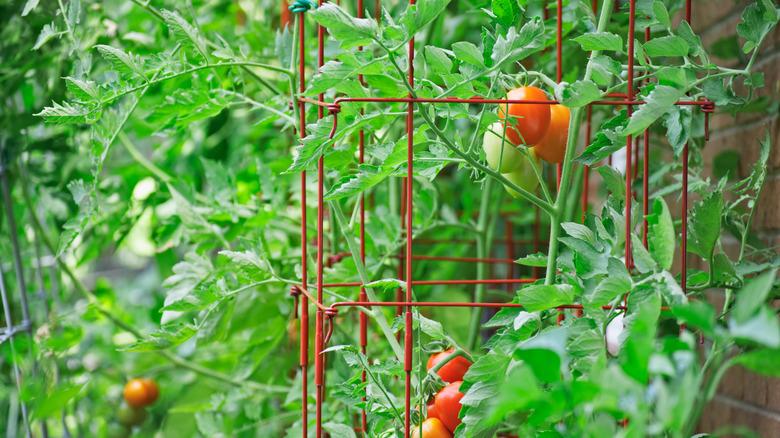
3. Tomato Cages and Structural Supports
Not every protector is about weather. Structural support is one of the most important forms of protection for tomato plants. An unsupported indeterminate tomato vine can sprawl along the ground, increasing disease risk, pest exposure, and fruit rot.
Tomato cages keep plants upright, improve airflow around the foliage, and prevent heavy fruit-laden branches from snapping. Standard wire cages from hardware stores work fine for determinate (bush) varieties. For taller indeterminate varieties that can reach 6 feet or more, look for reinforced cages or build your own with heavy-gauge concrete reinforcing wire.
Other support options include:
- Stakes and ties: Simple and cheap. Drive a 5–6 foot stake beside the plant and loosely tie the main stem every 8–12 inches as it grows.
- Tomato spirals: A single spiralling metal rod that the vine winds around as it grows. Works well for smaller varieties.
- The Florida weave: A commercial technique using posts and twine to support entire rows of plants cheaply and efficiently. Worth learning if you grow more than a few plants.
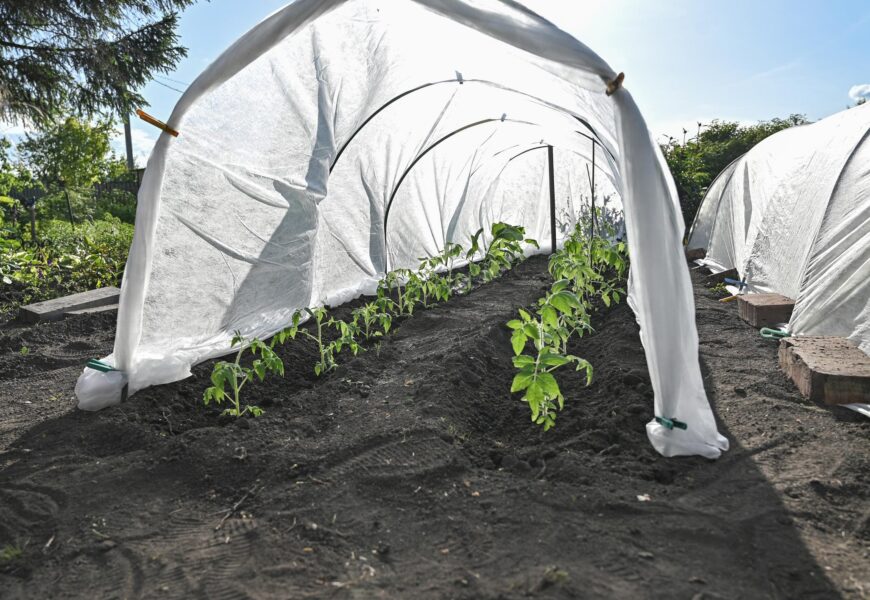
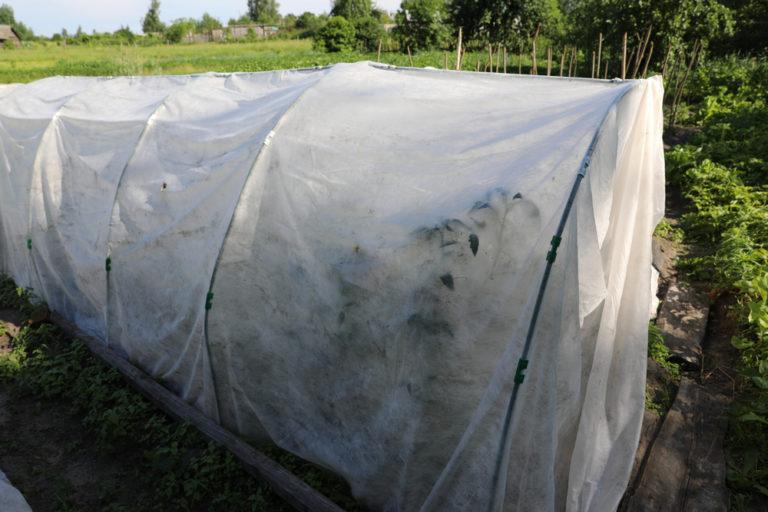
4. Hoop Tunnels
Hoop tunnels are DIY or commercial structures made by arching flexible conduit, PVC pipe, or wire over garden beds and covering with frost cloth, plastic sheeting, or netting. They create a mini-greenhouse effect and protect multiple plants at once.
A plastic-covered hoop tunnel can extend your tomato season significantly on both ends — allowing earlier planting and protecting late harvests from fall frost. They’re particularly valuable in short-season climates where the growing window for tomatoes is tight.
The downside is cost and setup time. But if you’re growing tomatoes seriously, even a simple single-row hoop tunnel built with PVC pipe and frost fabric pays for itself quickly.
5. Shade Cloth
Most gardeners think about keeping tomatoes warm. But in hot climates, keeping them cool is just as important. Sustained temperatures above 95°F (35°C) cause blossom drop — the plant stops setting fruit entirely. Above 100°F, foliage can scorch.
Shade cloth with 30–40% light reduction is typically used for tomatoes in hot climates. It blocks some direct radiation while still allowing enough light for healthy growth. Attach it to a simple frame over the plants using clips or zip ties.
If you garden in a hot-summer region and have struggled with tomatoes dropping blossoms in July and August, shade cloth is one of the first things worth trying.
6. Insect Netting and Pest Barriers
Physical barriers against pests are often more effective than chemical treatments — and safer for pollinators. Fine mesh insect netting draped over hoops keeps aphids, whiteflies, hornworm moths, and other insects away from plants during vulnerable periods.
The tradeoff: you need to open the net periodically for pollination (tomatoes are mostly self-pollinating but benefit from wind movement and bee activity). Some gardeners use netting early in the season, then remove it once plants are strong enough to handle minor pest pressure.
For cutworms and soil-level pests, a simple physical collar around the base of young transplants does the job. Cut a cardboard tube (like a toilet paper roll) or strip of aluminium foil and press it 2 inches into the soil around each plant.
7. Copper Tape and Slug Barriers
Slugs and snails love young tomato seedlings, especially in wet seasons. Copper tape creates a mild electric reaction when slugs contact it, deterring them without chemicals.
Apply copper tape around the rim of containers or in a ring on the ground around young plants. It’s not foolproof — if a leaf touches the ground beyond the tape, slugs can bypass it — but combined with other good garden hygiene practices, it’s effective.
8. Mini Polytunnels and Cold Frames
For gardeners who want maximum protection with some permanence, a cold frame (basically a low rectangular box with a transparent lid) or a mini polytunnel offers serious season extension. Tomato seedlings can be hardened off inside a cold frame before transplanting. Established plants can be grown inside low polytunnels in cooler regions.
In the UK, many gardeners grow tomatoes entirely under polytunnel cover for most of the summer — not because of cold, but because the consistently higher temperatures and rain protection improve fruit set and reduce blight risk significantly.
9. Windbreaks and Microclimate Management
Wind is an underappreciated enemy of tomato plants. It increases water stress, snaps branches, and makes temperature drops worse. A simple windbreak — whether it’s a fence, a row of tall companion plants, or commercial windbreak netting — can significantly improve growing conditions.
Think about where cold air pools in your garden (usually low spots or corners sheltered from afternoon sun). These are your worst planting locations for tomatoes. A well-placed windbreak and a slightly raised planting bed in a sunny, sheltered spot can create a microclimate 5–10°F warmer than exposed areas nearby.
Comparing Tomato Plant Protectors: A Quick Reference
| Protector Type | Main Threat It Addresses | Cost Range | Best For |
|---|---|---|---|
| Frost blanket / row cover | Frost, cold snaps | All gardeners | |
| Wall-O-Water | Frost, cold soil | Cold-climate early planting | |
| Tomato cage / support | Wind, breakage, disease | All tomato types | |
| Hoop tunnel | Frost, rain, pests | Serious gardeners | |
| Shade cloth | Heat stress, blossom drop | Hot-climate gardeners | |
| Insect netting | Aphids, moths, whiteflies | Organic growers | |
| Copper tape | Slugs and snails | Wet climate gardeners | |
| Cold frame / polytunnel | Season extension, rain | Long-term investment | |
| Windbreak | Wind stress, cold air | Exposed garden sites |
When Should You Install Tomato Protectors?
Timing matters as much as the tool itself. Here’s a practical seasonal breakdown:
Early spring (before planting): Install Wall-O-Water devices 1–2 weeks before setting out transplants to warm the soil. Set up structural supports (cages, stakes) at planting time — it’s much harder to add them once plants are established.
Late spring: Keep frost blankets nearby through the last expected frost date in your area. Even after the average last frost date, a sudden cold snap is possible for a few more weeks.
Summer: Deploy shade cloth if temperatures consistently exceed 90°F (32°C) for long stretches. Check for pests regularly. Consider insect netting around young fruit clusters if caterpillar pressure is high.
Fall: When nights start dropping toward 50°F (10°C), cover plants overnight to keep them warm and extend harvest. A few extra weeks of frost protection in fall can mean the difference between green tomatoes and fully ripe ones.
A Real-World Example: Extending the Season by 6 Weeks
A small-scale market farmer in Ontario, Canada, posted a breakdown of her season protection strategy on a gardening forum a few years back. She was in a climate where the typical tomato-growing window is only about 14 weeks frost-free.
Using Wall-O-Water devices to start 4 weeks early and frost blankets to push the season 2–3 weeks into fall, she effectively got 20–21 weeks of productive growing time. Her total harvest was nearly double what she got the previous year with no protection measures.
The investment was less than $80 for all her protectors. The return in produce and farmers’ market income was substantial. That’s not an unusual story — the ROI on physical plant protection is genuinely high.
Conclusion
Protecting your tomato plants isn’t complicated — but it does require thinking ahead. The gardeners who get consistent, reliable harvests are the ones who put protectors in place before the cold hits, the pests arrive, or the midsummer heat takes over.
Your action step: Before the next frost is in the forecast, pick up a set of frost blankets or Wall-O-Water devices. Set up your cages at planting time, not after the plants are already flopping over. These two things alone will have a bigger impact on your harvest than any fertiliser or spray you could apply.
Your tomatoes are worth protecting. Plan for problems before they happen, and you’ll spend a lot more time harvesting and a lot less time replanting.
Frequently Asked Questions
What is the best frost protection for tomato plants?
For individual plants, Wall-O-Water season extenders provide the best frost protection, rated down to about 16°F (–9°C) when filled properly. For rows or beds, heavy-weight frost blankets draped over hoop supports are the most practical option.
Should I cover tomato plants when it rains?
Not for light rain; tomatoes generally handle that fine. But in regions with prolonged heavy rain, overhead cover (a polytunnel or even a simple clear plastic sheet on hoops) significantly reduces the risk of late blight and other fungal diseases that spread in wet conditions.
Do tomato cages actually help the plants?
Yes, substantially. Besides preventing branch breakage, cages improve airflow through the plant, which reduces fungal disease. Caged plants also keep fruit off the soil, preventing ground rot and making it easier for you to harvest.
When should I remove tomato plant covers?
Remove frost covers during the day whenever temperatures are above 45°F (7°C) to allow light in and prevent overheating. Insect netting can be removed once flowers appear if you need to ensure good pollination. Shade cloth can be removed during cooler stretches to maximise light in fall.
Can I leave tomato cages in the ground over winter?
You can, but it’s not ideal. Metal cages rust faster when left in wet soil. Clean them, dry them, and store them indoors or in a dry shed over winter, and they’ll last many more seasons.
[mc4wp_form id="5878"]