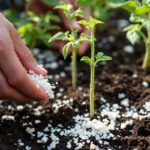
Learn 7 reliable asexual plant propagation methods from stem cuttings to tissue culture with practical tips, common mistakes, and expert insights for better results.
Introduction
You take a cutting from your favourite plant, stick it in some soil, and water it faithfully for three weeks — and nothing happens. Sound familiar? Most people assume they did something wrong. But the truth is, asexual plant propagation is both simpler and more nuanced than most gardening guides let on.
Here’s what changes everything: understanding why each method works, not just how to do it. When you know the biology behind vegetative propagation, the whole process starts making sense — and your success rate goes from frustrating to genuinely satisfying.
This guide covers seven well-tested propagation methods, the science that makes them work, practical troubleshooting for common failures, and which approach fits which plant. Whether you’re a home gardener trying to multiply your monstera or a small-scale nursery grower looking to streamline clonal production, this is built for you.
What Is Asexual Plant Propagation (And Why Should You Care)?
Asexual plant propagation — also called vegetative propagation or clonal propagation — is the process of growing new plants from the vegetative parts of an existing one: stems, leaves, roots, or even single cells in the case of tissue culture.
No seeds. No pollination. No genetic lottery.
Every new plant produced this way is genetically identical to the parent. That’s the whole point. If you have a disease-resistant tomato variety, a rare heirloom rose, or a houseplant with perfect variegation, asexual propagation lets you reproduce that exact genetic profile — reliably, repeatedly, and at scale.
This is why commercial nurseries propagate the vast majority of fruit trees, ornamentals, and speciality crops through vegetative methods. It’s not just efficient — it’s the only way to guarantee consistency.
The Biology Behind It: Why Plants Can Regenerate
Plants are remarkably different from animals in one key way: most of their cells retain totipotency — the ability to develop into a complete organism. This is possible because plant cells don’t become permanently specialised in the same way animal cells do.
When you cut a stem, the plant responds to the wound by activating dormant meristematic tissue (groups of undifferentiated cells capable of growth). In the right conditions — moisture, warmth, and sometimes a little hormonal nudge from rooting compounds — these cells begin differentiating into root tissue.
That’s regeneration in action. And it’s the foundation of every propagation method covered here.
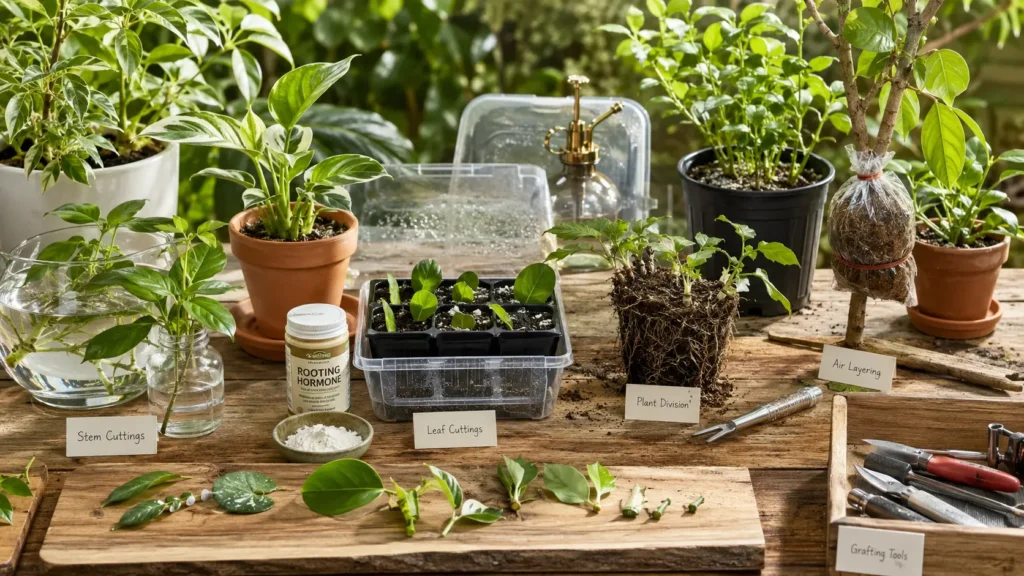
The 7 Core Methods of Asexual Plant Propagation
1. Stem Cuttings: The Most Common Starting Point
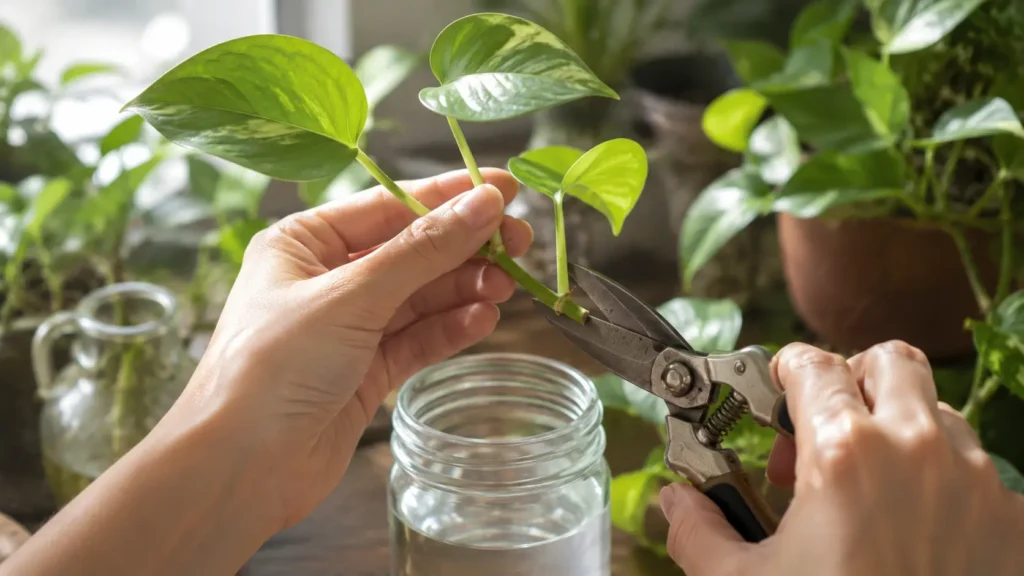
Stem cutting is the method most people try first, and for good reason: it works on a wide range of plants, requires minimal equipment, and produces results relatively fast.
The basic process involves taking a 4–6 inch section of stem (with at least two or three nodes), removing lower leaves, and placing the cut end in a rooting medium – water, perlite, potting mix, or a combination. Roots typically emerge within 2–6 weeks depending on the species.
What actually determines success here:
- Node placement: Roots emerge from nodes (the points where leaves attach to the stem), so make sure at least one node is submerged in your rooting medium.
- Cut angle: A 45-degree cut increases the surface area exposed to moisture and improves rooting speed.
- Leaf management: Too many leaves = too much water loss through transpiration before roots form. Strip everything below the rooting line and keep only 2–3 leaves at the top.
- Humidity: High humidity (70–90%) dramatically improves cutting survival. A plastic bag or dome propagator is worth using, especially for tropical plants.
Pothos, coleus, rosemary, hydrangea, fuchsia, and tomatoes all respond extremely well to stem cuttings. Succulents and cacti need a callusing period of 24–72 hours after cutting before being placed in soil – skipping this step is one of the most common reasons succulent cuttings rot.
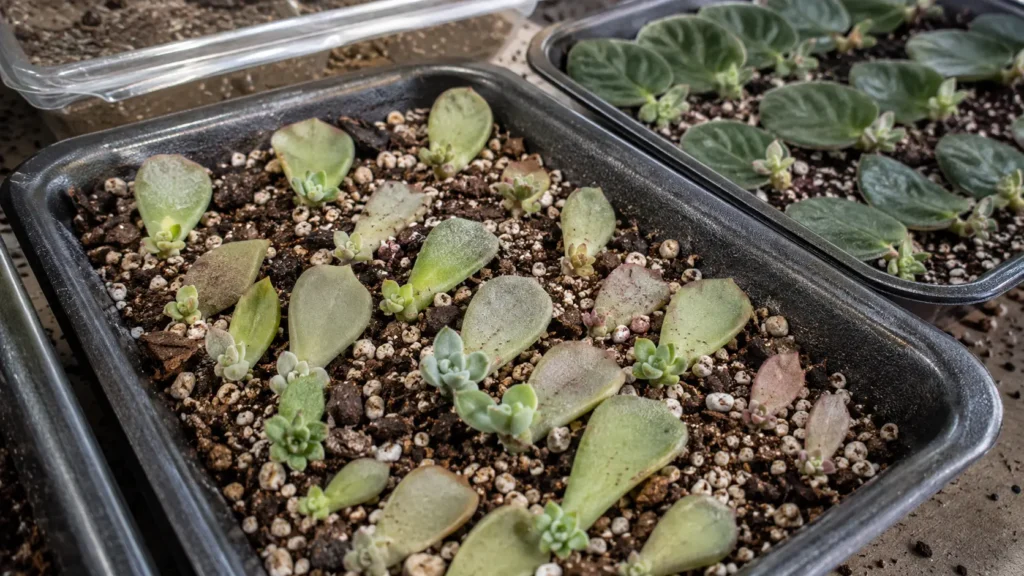
2. Leaf Cuttings: Propagating From a Single Leaf
Certain plants can regenerate entirely from a single leaf. It sounds almost implausible, but it’s real — and genuinely impressive to watch.
Succulents like echeveria and sedum are the most well-known examples. You gently twist off a healthy leaf (ensuring the base is intact), lay it on dry soil or cactus mix, and wait. Within a few weeks, tiny rosettes begin forming at the base of the leaf. The original leaf eventually shrivels and dies once the new plant is self-sustaining.
African violets (Saintpaulia spp.) are another excellent candidate. A single leaf with its petiole (leaf stalk) inserted into moistened perlite or vermiculite will produce multiple small plantlets around the petiole base.
Two leaf-cutting variations worth knowing:
- Leaf + petiole: The whole leaf with its stem (African violets, begonias)
- Leaf sections: Cutting a leaf into sections, each capable of producing new growth (snake plant/Sansevieria, rex begonia)
For snake plants specifically, you can slice a single leaf into 2-inch segments and press each one vertically into rooting medium. Each segment has the potential to produce a new plant — though it will lose the yellow banding of variegated cultivars, since that trait isn’t present in all cells.
3. Root Cuttings: Working Below the Surface
Root cuttings are less frequently discussed but genuinely effective for a specific group of plants. The idea is exactly what it sounds like: sections of root are taken during dormancy, placed in a growing medium, and new shoots emerge from the root tissue.
This method works best for plants that naturally spread by root suckering — think raspberries, blackberries, Japanese anemone, phlox, and Oriental poppies (Papaver orientale).
Timing matters significantly here. Root cuttings are typically taken in late autumn or winter when the plant is dormant and carbohydrate reserves in the roots are at their highest. Thick roots (pencil-width or thicker) are cut into 3–4 inch sections and laid horizontally in trays, covered with an inch of compost. Thinner, fibrous roots are inserted vertically, with the top cut end facing up.
4. Division: The Simplest Method Nobody Talks About Enough
Plant division is arguably the easiest propagation method, and yet it’s often overlooked because it doesn’t feel as impressive as the others.
The process is simple: you dig up a clumping plant and physically separate it into two or more sections, each with its own root system and shoots. Replant, water well, and you’re done.
This works perfectly for hostas, daylilies, ornamental grasses, sedums, many ferns, and most clumping perennials. Division actually benefits the parent plant by preventing overcrowding and encouraging fresh, vigorous growth.
When to divide:
- Spring-flowering plants: divide in autumn
- Autumn-flowering plants: divide in spring
- Summer perennials: divide in either early spring or autumn
The only real skill involved is making clean cuts (a sharp spade or garden knife works better than tearing) and ensuring each division has a reasonable amount of roots. Plants don’t need to be perfectly balanced — even a small section with two or three healthy shoots and a good root mass will establish fine.
5. Layering: Propagation While the Plant Is Still Attached
Layering is a technique where a stem is encouraged to root while it remains connected to the parent plant. It’s one of the most reliable methods for plants that are stubborn to root from cuttings.
Ground layering (also called simple layering) involves bending a low-growing stem to the ground, wounding the underside slightly (a small notch or removed strip of bark), burying that section under a few inches of soil, and securing it with a bent wire or stake. The buried section roots over several weeks to months. Once roots are established, you sever the connection to the parent and transplant the new plant.
Rhododendrons, azaleas, climbing roses, wisteria, and magnolias are all commonly propagated this way.
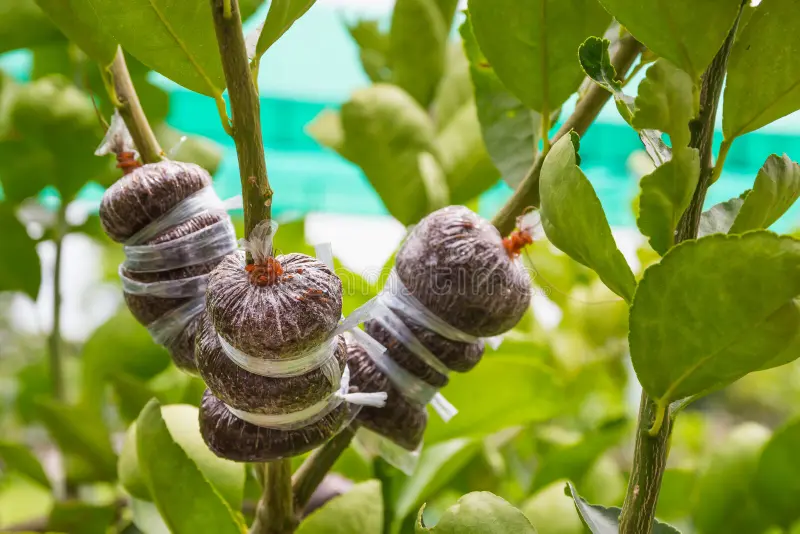
Air layering is the technique for plants where you can’t bend a stem to the ground. A section of stem is wounded (bark removed in a ring or a notch cut upwards), the wound is packed with moist sphagnum moss, and the whole thing is wrapped tightly in clear plastic film to retain humidity. Roots form into the moss over 4–12 weeks.
Air layering is particularly useful for large houseplants like rubber trees (Ficus elastica), Chinese evergreens, and dracaenas that have become too tall or leggy. Instead of discarding the upper section, you air layer it, allow roots to form, and then cut below the rooted section and pot it up — giving you a brand new plant at a manageable size.
6. Grafting: Combining Two Plants Into One
Grafting is the most technically demanding method on this list but also one of the most powerful. A scion (a shoot or bud from the desired plant) is joined to a rootstock (a rooted plant chosen for its vigour, disease resistance, or environmental adaptability). When the vascular tissues of both align and heal together, the two plants essentially function as one.
This is how virtually all commercial apple trees are produced. It’s also how many rose cultivars, citrus trees, tomatoes, and grapes are grown. The rootstock determines root system characteristics; the scion determines the fruit, flower, or foliage.
Common grafting types:
| Graft Type | Best For | Skill Level |
|---|---|---|
| Whip and tongue | Thin stems of similar diameter | Intermediate |
| Cleft graft | Larger rootstock, smaller scion | Intermediate |
| Budding (T-budding) | Roses, fruit trees | Intermediate–Advanced |
| Approach the graft. | Difficult-to-root species, cacti | Intermediate |
| Splice graft | Tomatoes, cucumbers (vegetable grafting) | Beginner–Intermediate |
The key factor in grafting success is cambium contact — the thin layer of actively dividing cells just beneath the bark must align between scion and rootstock. Misalignment is the number one reason grafts fail.
For home gardeners curious about trying grafting: tomato grafting onto disease-resistant rootstock is an accessible starting point, and it has real practical benefits (resistance to soil-borne diseases like Fusarium and Verticillium wilt).
7. Tissue Culture: Propagation at the Cellular Level
Tissue culture (or micropropagation) is the most advanced and scientifically intensive method on this list. It involves taking tiny pieces of plant tissue — sometimes just a few cells — and growing them in sterile nutrient media in laboratory conditions.
While this isn’t something most home gardeners will attempt, it’s worth understanding because it underlies so much of the commercial plant industry. Tissue culture allows the following:
- Propagation of thousands of identical plants from a single parent
- Production of disease-free stock (particularly important for orchids, potatoes, and strawberries)
- Conservation of rare and endangered plant species
- Year-round production independent of season
Many of the houseplants sold in garden centres — especially orchids and ferns — were originally produced via tissue culture. The dramatic price drop in orchid availability over the past two decades is directly attributable to large-scale micropropagation making mass production possible.
A small but growing number of hobbyists are experimenting with DIY tissue culture using purchased growth media and sterile technique. It requires patience and precision, but the results can be extraordinary.
Choosing the Right Method: A Quick Reference
Matching the propagation method to the plant type makes a significant difference in your success rate. Here’s a practical guide:
| Plant Type | Best Methods | Notes |
|---|---|---|
| Herbaceous perennials | Division, stem cuttings | Divide every 3–5 years for best vigour. |
| Woody shrubs | Stem cuttings, layering | Semi-hardwood cuttings often work better than softwood |
| Fruit trees | Grafting, budding | Rootstock choice affects tree size and disease resistance |
| Succulents & cacti | Leaf cuttings, offsets | Always callus before planting |
| Tropical houseplants | Stem cuttings, air layering | High humidity critical for rooting |
| Orchids | Keikis (offshoots), tissue culture | Seed germination requires symbiotic fungi |
| Ferns | Division, spores | Division is far more reliable than spore propagation at home |
| Raspberries/blackberries | Root cuttings, tip layering | Take root cuttings in late winter |
Common Reasons Propagation Fails (And How to Fix Them)
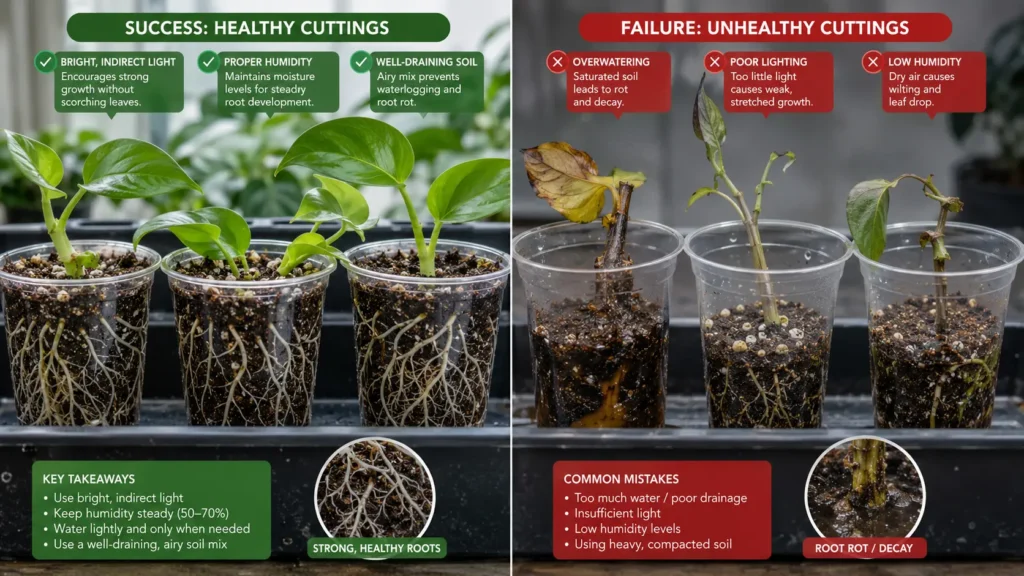
Have you ever done everything “right” by the book and still watched your cuttings wilt and die? You’re not alone — and usually the cause is something fixable.
1. Cutting taken at the wrong growth stage Softwood cuttings (taken from actively growing, soft new growth) root fastest but wilt easily. Semi-hardwood cuttings (from mature tissue that’s firmed up slightly) are more resilient but slower to root. Hardwood cuttings (fully dormant, woody material) are the most robust but need the longest lead time. Matching cutting type to species and season matters more than most beginner guides acknowledge.
2. Inadequate moisture control Cuttings need high ambient humidity but not waterlogged roots. The most common propagation mistake is overwatering — saturated soil restricts oxygen and causes rot before roots can form. A misting system or humidity dome combined with a well-draining medium (50% perlite + 50% compost, or pure perlite) gives you moisture retention without saturation.
3. Skipping or misusing rooting hormone Rooting hormones (typically indole-3-butyric acid, or IBA) accelerate adventitious root formation. Powder formulations are most shelf-stable; gel formulations provide excellent wound contact. But more is not better — too high a concentration can actually inhibit rooting. Use the recommended rate for the plant category (there are usually three concentrations: for easy, moderately difficult, and difficult-to-root species).
4. Light exposure during rooting Cuttings don’t yet have roots to take up water, so exposing them to direct, intense sunlight while they’re trying to root stresses them severely. Bright, indirect light is the target — enough to support minimal photosynthesis without driving excessive water demand.
5. Poor hygiene Pathogens (especially Pythium and Botrytis) spread quickly in propagation environments. Use clean tools, sterile or pasteurised growing medium, and clean containers. Wiping tools with isopropyl alcohol between cuttings is a simple habit that prevents a lot of losses.
A Real-World Example: Propagating a Meyer Lemon Tree
Let me give you something concrete. A friend inherited a twenty-year-old Meyer lemon tree that had been carefully maintained for decades — exceptional fruit quality, disease-free, and perfectly suited to the local climate. When they moved, bringing the tree was impossible. Losing the genetics entirely was genuinely sad.
They used air layering on two of the most vigorous branches three months before the move. Moss was applied and wrapped in plastic, and roots filled the moss ball within ten weeks. Both sections were cut from the parent, potted into well-draining citrus mix, and kept in a sheltered, humid spot for two weeks to reduce transplant shock.
Both plants established successfully. Two years later, they’re fruiting. The entire genetic profile of that irreplaceable tree survived the move through a technique that’s been used by gardeners for centuries.
That’s the real value of knowing these methods — not just multiplying cheap plants, but preserving what matters.
Conclusion
Asexual plant propagation isn’t a trick or a shortcut — it’s one of the most practical, science-backed skills a gardener can develop. Whether you’re keeping a beloved plant variety alive through division, filling your garden with cuttings from a single parent plant, or learning air layering to save a specimen that can’t be transported, the underlying principle is always the same: plants want to grow. Your job is to give them the right conditions to do it.
Start with what you have. If you’ve got a pothos, take a cutting today. If you’ve got an overgrown hosta, divide it this autumn. If you’ve got a fruit tree worth preserving, look into layering or grafting this spring.
The more methods you practise, the more plants become genuinely renewable — not just purchases, but ongoing, multiplying living things that you can share, trade, and preserve across years.
Frequently Asked Questions
What is the easiest form of asexual propagation for beginners?
Division is the most beginner-friendly method because you’re working with an already-established root system. For those interested in cuttings, pothos (Epipremnum aureum) and coleus are extremely forgiving and root readily in water, making them ideal practice plants.
How long does it take for cuttings to root?
This varies considerably by species and conditions. Easy-rooting plants like pothos or spider plants may show roots within 1–2 weeks in water. Woody plants like hydrangeas or roses typically take 3–6 weeks in rooting medium. Air layers on established trees can take 8–16 weeks. Temperature plays a significant role — bottom heat (around 70–75°F / 21–24°C at the root zone) significantly speeds the process.
Is vegetative propagation the same as cloning?
Yes — functionally speaking. Asexual propagation produces genetically identical copies of the parent plant, which is exactly what cloning means in a biological context. The term “cloning” tends to evoke high-tech laboratory imagery, but layering, division, and cuttings have been achieving the same genetic outcome for thousands of years.
Can all plants be propagated asexually?
Most flowering plants can be propagated by at least one vegetative method, but not all. Some plants only produce viable offspring through seed (either due to biological constraints or legal protection – Plant Breeders’ Rights legislation in many countries restricts propagation of patented varieties). A few species produce sterile clones that won’t root at all through conventional means and require tissue culture for commercial-scale production.
Does the season matter for taking cuttings?
It matters a great deal for some plants and very little for others. Tropical houseplants propagated indoors are relatively season-independent because indoor temperature and light are controlled. Outdoor woody plants follow stricter seasonal windows — spring for softwood, midsummer for semi-hardwood, and late winter for hardwood cuttings. Following the natural growth cycle of the plant dramatically improves success rates.
What rooting medium works best for stem cuttings?
There’s no single universal answer, but a combination of 50% perlite and 50% coco coir or peat-free compost is a reliable baseline for most cuttings. Pure perlite works well for succulents and cacti. Water rooting is simple and visible, though plants rooted in water sometimes struggle slightly with the transition to soil — using dilute liquid seaweed or a very weak nutrient solution in the water can ease this.